I’m not an expert on grilling. It’s not that I don’t like it. On the contrary, when I grill something after not having done so for a while, I’m bowled over, wondering how anything could possibly taste better. But anything done too frequently begins to lose its savor. For me, grilling is most enjoyable when done somewhat rarely. A grilled ribeye once a month is a revelation. A grilled ribeye every other day is boring.
And so I love to grill, but it seems like I never do it enough to get really good at it. When using real wood or charcoal, it can also be quite hard. Really good grill masters can assess the heat of their fire by look or a mere wave of the hand. I’m not really inspired by grilling with gas, and grilling with wood can be an undertaking: having wood or charcoal on hand, starting the fire, maintaining the fire, cleaning the grill afterward. Ugh.
A lot of grilled food is also dreadful: overcooked steaks, burned and dried-out vegetables which taste of nothing but char, a beautiful piece of chicken slathered in sauce. It is not easy to grill well, as popular as it might be.
But I have learned a thing or two. Having had my share of flavorless, dried-out grilled vegetables, I recently resolved to pick one to focus on and to find a way to make it delicious. I picked zucchini. Specifically, I picked large zucchini, the kind which someone with a garden inevitably has to deal with from time to time. I don’t mean the huge baseball bat zucchini which belong in the compost, but large ones weighing about a pound or a little less. They’re actually ideal for grilling because they can be cut into large and thick slices, easy for turning and easy to keep from falling through the grill itself. If you only have smaller zucchini, by all means use them. But it will be a bit more difficult.
The biggest challenge with grilled vegetables is that they don’t have any fat. It’s relatively easy to grill a chicken thigh or a ribeye steak or a burger because of their fat content. Not so with zucchini. But I had an intuition that if I steeped the zucchini for a little while with olive oil, it would absorb enough to make it through its time on the grill while maintaining a moist texture and luscious exterior.
After a few false steps, I produced exactly the grilled zucchini I was looking for, with a deep grilled flavor but with a creamy and downright unctuous texture. Here’s how I do it.
Grilled Zucchini
Begin by slicing the zucchini into very thick slices, about ½ inch or just a little less. A mandolin would be great for producing perfectly uniform slices. I don’t have one, but I do have a deli slicer. You can use a knife, but it will be much harder. It’s very important that the zucchini be thick. They will shrink considerably during cooking and they need to be thick to be turned easily and to not turn into mush.
Season with salt and pepper and crushed red pepper and brush with high quality olive oil. Almost every part of the surface on both sides should be covered. I actually use a water misting bottle which I fill with olive oil. Allow to steep for at least 15 minutes, maybe up to 30 or so.
Produce a fire of moderate heat (one that you can hold your hand over for about 5 seconds) and lay the zucchini slices on the grill without overlapping. I do not pat them dry because I want the olive oil on the surface. I make sure the fire is not so close or so hot as to cause major flare ups. I also cook with the top on for the same reason. Cook for 3 to 5 minutes until nicely browned. Flip and do the same on the second side.
Yes, those are hotdogs. I’m not quite the food snob I seem.
Even for such thick slices, 6 to 10 minutes should be plenty of cooking time. The zucchini are best when they still have some texture and are not complete mush. Plate the zucchini and drizzle with additional olive oil and some sort of fresh herb. I think mint is a perfect companion for zucchini, but thyme is also lovely, as are basil and/or parsley.
Serve at once or even cooled down to room temperature. I don’t generally fancy lukewarm dishes, but this one works well.
I was making a favorite pasta sauce the other day, and it occurred to me how many excellent principles of good Italian cooking the sauce, simple as it was, demonstrated. So, I thought I’d share it – with more commentary than usual – with the hope of making more clear and concrete some of the principles which make Italian cooking successful.
I’ve been making the sauce for years, and I first discovered it in one of Marcella Hazan’s wonderful books. It’s always worth quoting Marcella at length, and here is her intro to the recipe:
“This is a sauce picked up, as it were, on a walk in the woods. It had been a good day for walking, and Victor and I had wandered past our lunchtime into the early afternoon. Famished, we retreated to the nearest hamlet, a dozen houses, one of which had a sign: Bar Panini. Panini – sandwiches – are not what my husband considers food, but we had no other choice. Men were sitting at wooden tables, drinking grappa, talking about football. A pleasant, open-faced woman was behind the counter. My husband turned to her with his warmest gaze and pleaded, “Isn’t there anything besides panini one can eat?” “Yes, if you can wait twenty minutes,” she smiled back. It was closer to thirty minutes, but we sat down to a plate of pasta that tasted like the best food on earth. She had browned bits of spicy sausage in sweet homemade butter and garlic and added tomatoes she had sent a little boy to pick from the garden back of the house. It’s a long story for a quick sauce, but it illustrates the impromptu nature of what to me is the best kind of Italian cooking.”
It’s a delightful story, no? Part of what first drew me to Marcella’s cookbooks years ago were delightful anecdotes such as this one, presented with elegance and significant charm. Marcella’s husband, Victor, was her collaborator, and because she wrote only in Italian, it is always his words that we find on the pages of her cookbooks. Victor is one of the most remarkable writers I know, and this collaboration between cook and writer produced some of the finest cookbooks in English.
For Marcella, the point of the story is the “impromptu” nature of Italian cooking, and this point is critical to me, too. The old, tired stereotype of tomato sauces simmering all day is one which needs to go. While certainly there are sauces which need to cook a long time, these sauces are the rare exception rather than the rule. In most cases, a sauce takes less time to prepare than it takes to heat a pot of pasta water. In the dead of winter, slow-cooked sauces might offer something special to the soul, but for most of the year, what one wants in cooking is freshness above all, which requires fine ingredients, brief cooking, and a light hand.
Marcella proceeds to give her version of the sauce she described in the story. But it would be a mistake to take her version as some kind of “definitive” version. Indeed, the very idea of a “definitive” version of anything is anathema to Italian cooking. Instead, Italian cooking is informed by the flexible but good judgment of a cook as expression of her (or his) personality. While it’s true that many Italians can be absurdly particularly about certain very traditional dishes (just talk to a Bolognese about how to make ragù or a Roman about whether carbonara should have guanciale or pancetta), this kind of autocratic thinking about cooking is fortunately rare in Italy. And some Italians, like Marcella, knew better. In perhaps the most salient example, she published a recipe for the famous Roman pasta sauce Amatriciana which contained butter, something practically no Roman would support. Rome is dominated by olive oil, not butter, and many would see the use of butter as “inauthentic.” But, as Victor explained to me about this controversy,
“There are quarters where [Marcella’s] use of butter aroused scorn. Marcella was an extremely intelligent, well-educated woman, and a cook of genius. She was perfectly aware of the traditional formulations of regional specialties. It was not her intention to transcribe them literally, which would have cost her no effort, but to interpret them out of the flavors that she prized in cooking. I once described the flavors that Marcella summoned out of her imperishable dishes as constituting “kindness to the palate.” The origin of the dishes is unquestionably regional, but their tasting qualities are distinctly Marcella. This is what makes Marcella’s gastronomic achievement monumental and historic.”
I dwell on this point – that good Italian cooking is personal – because it informs how I prepare the sauce Marcella describes in the story above. I also dwell on it because it is one of the most important principles of good cooking. Too often, students of mine think their cooking will be improved by finding better recipes and following them to a T. But this is a misguided approach to cooking — even with my recipes — because no recipe can substitute for good taste and judgment, just as no musical score can be so precisely written that it frees the performer from the requirement of being musical. One becomes better at cooking not by finding better recipes but by cooking and eating more, developing the judgment and taste necessary to advance in the craft.
Marcella writes her recipe using fresh sauce tomatoes, presumably because that’s the way she first had it. But the idea that the sauce can only be made with fresh tomatoes is absurd. High-quality canned tomatoes are often better than fresh tomatoes (unless you grow them yourself), and certainly they’re less work to prepare. Usually that’s how I make this sauce. But in the past few weeks we’ve had an abundance of exquisitely sweet red cherry tomatoes, and in deciding to use those, in addition to a little tomato passata, I took the recipe in an entirely different and very personal direction. Below is a description of how I’ve made it recently. It’s a good starting point, but only if you use it as a launching-off point to make the sauce your own.
Pasta with sausage, tomatoes, and garlic (for about 200 to 250 grams pasta, about half a pound)
Begin by bringing a pot of water to a boil, using 1 to 2 tablespoons salt for a standard 4-quart pot.
While the pasta water is heating, brown about 8 ounces sausage in just a little bit of olive oil, just enough to keep everything lubricated but no more. This sauce relies on butter, and too much olive oil will clash. But it’s important to start with olive oil so that you can brown the sausage over vigorous heat, which would burn the butter.
When the sausage is nicely browned all over, add about 2 or 3 teaspoons chopped garlic and about 4 tablespoons butter, making sure the heat is not so intense that will immediately burn the butter or garlic. For me, and I think for Marcella too, the identity of this sauce is largely characterized by the interaction of garlic and sweet butter, offering a foundation for the tomatoes. Getting the butter and garlic right is an important step.
When the garlic has become lightly colored and aromatic and the butter has lost its raw character, add about half a pound of cherry tomatoes, sliced in half or quartered. Note in the photo below that the cherry tomatoes are touching the bottom of the pan, cut-side down. This will help them begin to break down just a bit while retaining their shape and identity. Keep the heat significant but not so strong that things are burning.
After a few minutes, add about a cup or as much as two cups of high-quality canned tomatoes (broken up by hand) or, better yet, use high-quality canned tomatoes which have already been turned into passata with a food mill. Passata is basically a tomato purée, but less thick and more fresh tasting than purchased purée. It is extremely useful to have on hand when you want a smooth sauce. It’s certainly not essential, but it’s what I use instead of simple, crushed tomatoes.
Season with salt and pepper (and/or hot pepper if you like). Once the sauce comes to a simmer, lower the heat so that the sauce bubbles gently for 5 or maybe 10 minutes, adding water as necessary. Regulating the moisture content of a pasta sauce is one of the most important skills a cook can learn. You don’t want it soupy, but you want it moist.
Try to resist stirring much. The special quality of this sauce, as I make it, is to preserve the cherry tomatoes as unique and recognizable. If they simply disappear into the sauce, they’ve lost their reason for being. If you use a good cherry tomato, a tasty variety picked ripe, you’ll be rewarded with little bursts of sweetness on the palate. This is the distinguishing feature of this sauce which makes it my own rather than Marcella’s. For me, the little surprising bursts of exquisite sweetness make this sauce sing.
When the pasta is ready, drain it and add it to the pan with the sauce. Toss rapidly, adding a generous bit of freshly chopped parsley, and serve at once.
Note that the sauce in this photo is a little shy of tomatoes. More tomato would certainly not be unwelcome.
Fall comes to the farm long before temperatures cool and leaves change color. By August 1, more than a month after the days begin to shorten, many crops begin to look a little tired. Although a skillful grower can keep tomatoes, eggplant, cucumbers, etc. growing, it becomes a challenge.
Our first two plantings of zucchini have succumbed to August malaise, but a third planting (transplanted on July 9), continues on. Perhaps many people have tired of zucchini by this time of year, but not us. It’s one of the most versatile vegetables in the kitchen, taking on different guises with aplomb.
This is one of our favorite ways to prepare zucchini. In agrodolce means “sweet and sour”, and it is a classic flavor combination in Italy. Although often the “sweet” component is sugar, in this case we allow sweet onions to provide that role. The sour comes from high-quality red wine vinegar.
I tend not to favor room-temperature food, but this is a preparation which is successful when served both piping hot and lukewarm.
Zucchini in agrodolce
Beginning by slicing about 4 ounces of sweet onion. It can be done in wedges or thin slices. It really doesn’t matter; just not diced.
Add the onion to a small pan with a generous bit of olive oil, a little salt and a little hot pepper. When the onion is sizzling and starting to reduce a bit, add a cover and wilt over low heat for about 15 minutes, either on the stovetop or in the oven (350 to 400 degrees).
Meanwhile, slice about 10 ounces of zucchini into half moons or full rounds if the zucchini are rather narrow in diameter. It’s important that the slices be thick enough to maintain some texture when cooked. I aim for 1/4 inch thick or a little thicker. If you’re a precise person, aim for 3/8 inch thick.
Heat a large pan (about 12 inches wide) with enough olive oil to just coat the entire bottom of the pan, and when the oil just begins to send up a few wisps of smoke, add the zucchini in a single layer. It should just fit. Season with salt (1/4 to 1/2 teaspoon would be about right).
Brown deeply on one side over medium-high to high heat. It should take 3 to 5 minutes if the heat is right. If you go too long, the zucchini will become too soft.
Turn the zucchini and brown the second side, adding some hot pepper and perhaps some black pepper too.
When the second side is almost ready, add the wilted onions. Ideally they will be not just wilted but also much reduced and taking on some color.
Add about 1 tablespoon high-quality, strong red wine vinegar (about 7% acidity) along with a generous quantity of fresh mint or oregano and toss everything together for one minute or so before plating and serving.
There is, perhaps, no sight more depressing to a vegetable grower than the ubiquitous late-summer phenomenon of piles of overgrown zucchini being given away on little makeshift roadside tables dotting our rural, country roads.
Zucchini is the butt of jokes, its prodigious production and speed of growth overwhelming all but the most attentive caretakers. In order to keep our plants in good health and to keep the fruit size moderate, we pick twice a day, morning and night.
Indeed, there comes a point where even the most ardent enthusiasts of this noble fruit seem to have had enough.
But I don’t know of any vegetable more versatile in the kitchen or more able to take on different guises with aplomb. Zucchini fits in everywhere: in numerous side dish preparations, as a main course, in soups, in pasta sauces, in broth, in frittatas and risotto. The diverse uses of zucchini in the kitchen are more than able to keep up with the quantity this time of year. No zucchini should end up, sad and deflated, on some roadside table being given away for nothing.
So this will be the first in a series of posts on zucchini. I have the ambition and desire, if not the time, to publish a different zucchini recipe every day for a week. I’ll do my best, and hopefully offer some new ideas to those struggling to make the most of their zucchini this time of year.
First a note on the name and proper size of zucchini. In Italian, the word “zucca” means pumpkin or squash. Zucchini, therefore, is Italian for “little pumpkin”. Although in the US we tend to call the green type “zucchini” and all other colors and types “summer squash”, in Italian all summer squash are called “zucchini” and I follow that practice.
As for size, the human inclination to swing from one extreme to another has led some, in response to many zucchini being sold too large, to refuse to eat zucchini any larger than the diameter of a nickel. This is folly. I aim to harvest my zucchini at around 8 ounces, so that two together make a pound, though I think anything between 4 and 12 ounces is reasonable. Don’t let anyone convince you that little baby 2-ounce zucchini represent the pinnacle of zucchini pleasure!
Spaghetti with zucchini & mint (makes 2 or 3 servings)
Begin by cutting 8 ounces zucchini into half moons or little cubes. The choice you make here will affect the final result, but one is certainly not better than the other.
Also slice or chop about 2 to 4 ounces of onion and (optionally) an ounce or two of pancetta or bacon.
While your pasta water is heating, cook the pancetta and onion over medium-high heat in a generous bit of olive oil until a little softened and very lightly colored. Add the zucchini along with a pinch of salt and stir well.
It’s okay for the zucchini to overlap a bit, but not too much. Keep the heat strong enough to produce some real sizzle and some light browning, but not so strong that there’s a danger of burning. Be mindful that the zucchini has adequate lubrication, adding additional olive oil as needed.
After about 10 minutes, the zucchini should be softened and significantly reduced in bulk. Remove from heat.
Cook your pasta (about 150 grams for 2 to 3 people) in properly salted water (1 to 2 tablespoons for 4 quarts), and just before it is ready, return the sauce to strong heat. Taste for salt, and also season with black and/or hot pepper. Perhaps add a knob of butter if the spirit moves you. Finally, add a generous bit of mint leaves, either whole or chopped as you prefer. There is something about mint and zucchini which works beautifully. Of course, other herbs are suitable too (basil or parsley), but mint does something special for zucchini.
Drain the pasta and toss in the pan with the zucchini. Some people might add a little of the starchy pasta water, though I rarely do this.
Serve at once, garnished with a little drizzle of olive oil.
As if cultivators of the soil hadn’t already suffered enough indignities, for the past decade we’ve had to look on in horror as the honorable and delicious eggplant has been hijacked and transformed into an emoji sex toy. Truly our culture is one to regard with shame when fruits and vegetables are the source not of pleasure and delight but a butt of jokes and the material for the juvenile and insulting practice known as “sexting.” Truly we live in a hollow and bankrupt culture in which sex increasingly seems to be our only aspiration and interest. I’ve published my thoughts before on “food porn“.
But all one can do is resist, I suppose. In such a world it indeed feels good to be a cultivator of the soil and a producer of nourishing food. The more insane the world, the more important sanity becomes. In the case of eggplant, sanity demands that we reclaim this important vegetable and learn to cook it well.
I’m the first to admit that cooking eggplant isn’t easy and it presents several unique challenges. When cooked properly, it possesses an irresistible creaminess and lovely flavor. But when done poorly, it can be nasty indeed, both in flavor and texture. Can there be any dish more nauseating than poorly prepared “eggplant parm” — bitter, seedy eggplant covered with a thick bread crumb layer, smothered with thick tomato sauce and poor-quality cheese?
The first question to address with eggplant is the near universal instruction to salt it an hour or more in advance to “draw out the bitter juices.” This advice is as questionable as it is universal. It’s not wrong exactly, but only half right. Salting eggplant in advance does make sense because the salt develops the eggplant’s flavor and seems to inhibit the absorption of too much oil later when the eggplant is cooked, but it’s only needed to “draw out the bitter juices” when the eggplant is old and full of seeds. I have never encountered a fresh eggplant that is bitter. It’s a good insurance policy when using a supermarket eggplant, but not necessary when buying eggplant from a farmer’s market or when growing your own. But I pretty much always do it anyway because I want the salt to develop the eggplant’s flavor.
Nice, fresh eggplant with only immature seeds.
So I begin by salting the eggplant at the ratio I salt most foods (1% by weight). The salt I use (Alessi Sea Salt) happens to weigh just about 4.5 grams per teaspoon, and since a pound is 450 grams, a teaspoon of that salt is perfect. I always peel my eggplant because the skin contributes nothing and can be a distraction if it doesn’t completely soften. I slice my eggplant (usually in rounds but sometimes into long rectangles) and toss it with the salt before allowing it to sit in a colander for about an hour. It’s in a colander because liquid will indeed be drawn out which should drain off.
The main challenge with cooking eggplant is that it absorbs oil like a sponge. Cooking without oil produces dried-out eggplant without a creamy texture but cooking with too much oil produces oil-saturated eggplant, and even if one uses high quality olive oil, there can still be too much of a good thing.
The solution I settled on for years was following the advice of the late, great Marcella Hazan, who adored both frying and eggplant. She argues that if you deep fry the eggplant in enough oil and at the right temperature, it will not come out saturated with oil. I followed this advice for years and had good results, but two things bothered me. One thing that bothered me is that sometimes the eggplant still comes out a bit too oily. The second thing was that deep frying requires so much oil that it’s difficult to be able to afford to do it with extra virgin olive oil. If the eggplant was going to absorb oil, I at least wanted it to be extra virgin olive oil of the highest quality.
And so eventually I settled upon a cooking method which is easier and better than the one I learned from Marcella. I now shallow fry the eggplant over high heat in just enough olive oil that the eggplant will absorb nearly all of it, ensuring that the eggplant is enhanced with only the best and most flavorful oil, contributing to the creamy texture which is eggplant’s main reason for being. Cooking over high heat and cutting the eggplant to the right thickness keeps the cooking time short and prevents the absorption of too much oil.
Eggplant cooked in such a way is perfect on its own as an appetizer or side dish. It is perfect for turning into eggplant alla Parmigiana (the real one, not the disgusting American version), or for filling with ricotta and rolling into involtini. Or it can be chopped up and become part of a pasta sauce. Or it can be incorporated into the classic French dish ratatouille.
Pan-seared Eggplant
Eggplant comes in all shapes, sizes, and colors. All are good. Begin by peeling the eggplant and cutting it into slices about ½ inch thick. Salt at around 1% by weight and let steep in a colander for an hour or so. The eggplant should release a little juice.
Pat the eggplant dry and possibly slice in half if the pieces are very large. Heat a large pan (mine is 12 inches across) and add plenty of high quality olive oil. For a pan of this size, I start with about ½ cup olive oil. Just as it begins to send up faint wisps of smoke, add as many eggplant slices as will fit comfortably and cook over pretty high heat until nicely browned. Then flip and do the other side. I regulate the heat so that the slices get 2 to 3 minutes of cooking on each side. If they’re burning before that, the heat is too high. If they’re not browning deeply after 2 or 3 minutes, the heat should be higher.
If at any point the eggplant absorbs ALL of the oil, simply add more as needed. Sometimes it soaks up a lot, but then releases it again as it cooks. For this test batch I never had to add more. Half a cup was enough. But you need to keep the heat as high as you can to prevent absorbing excessive oil.
When the slices are nicely browned on both sides, carefully lift up with a spatula or pair of tongs and place on a rack to cool. It’s important to have air flow all around so that they don’t become soggy.
It’s okay to fry in batches (I can fit about 8 ounces of eggplant in one layer in a 12-inch pan, so if I’m cooking 1 pound of eggplant I usually need to fry in two batches). You probably need to add more oil between each batch, but sometimes not. If at any point the oil is all absorbed, immediately add more.
The eggplant is perfect hot, but also at room temperature. You know you did well if the eggplant is perfectly soft and creamy but without any sensation that they’ve been saturated with oil.
Let me set the scene. I’m in Savigno, Italy, a tiny rural hamlet within the province of Bologna. I’ve taken clients there for an afternoon of learning about white truffles followed by an early evening wine tasting with the heartthrob Gianluca. We’ve arrived for a late dinner at Amerigo 1934, one of the most famous restaurants within Bologna province. We’re giddy with excitement, maybe a little tipsy from the wine tasting. I explain that Amerigo is famous for its wild game and fresh pasta. One could order grilled wild pheasant, succulent pork shoulder, or perhaps meat-filled tortellini in broth, ravioli with prosciutto, a plate of exquisite charcuterie made from the famous Mora Romagnola pig breed. The cuisine of Bologna is rich and exquisite.
But we’ve been eating heavy for days, and a few women in the group turn to me and say What we really want are some plates of vegetables. I try to hide my displeasure while I roll my eyes in my head. I’m a vegetable farmer, of course, and a lover and promoter of vegetables, but in Savigno there are delicacies which can’t be had in the US. My clients persist. I eat my prosciutto and salami, my pork shoulder and tortellini. But they have the last laugh, because the plates of vegetables are exquisitely good, and one dish, a plate of sauteed Swiss chard, might have been the most delicious thing I ate all night.
As a farmer, I know that Swiss chard is a fantastic crop but it can be a tough sell. It’s a fantastic crop because it grows all season with minimal effort — unlike spinach, for example, which requires a lot of labor and only yields for 3 or 4 weeks before it needs to be turned in. But although chard is a farmer’s dream to grow, it can be a tough sell for customers. To begin with, the name doesn’t exactly whet the appetite. “Swiss” is okay, I suppose, but “chard”? No. I used to encourage my customers to call it by its beautiful Italian name, bieta. The word bieta sounds a little like the English word “beet” and that’s no coincidence. Chard and beets are very closely related, the main difference being that beets have been bred for root development and chard for leaf development. This is why the leaves of swiss chard, or bieta, have a faint flavor of beets. Other farmers have a hard time with the name too. One that I know has taken to cutting the chard at baby leaf stage and marketing it as “butter chard”, apparently with great success.
Not only is the name a stumbling block, but the cooking of chard is too. It’s simply not a vegetable people have heard of or know what to do with. It’s not included in many cookbooks, although I must add that the cookbook which most shaped my culinary path – Marcella Hazan’s The Essentials of Classic Italian Cooking – has several, and includes a loving defense of chard:
“There is no green more useful than Swiss Chard for Italian Cooking. Its broad dark green leaves, whose flavor is sweeter, less emphatic, than spinach, can be used in pasta dough to dye it green, or together with cheese, for the filling in a variety of stuffed pastas. The leaves are good in soup, delicious boiled and served with olive oil and lemon juice, or sauteed with olive oil and garlic. The broad sweet tasting stalks of mature chard are magnificent in gratin dishes, or sauteed, or fried.”
Indeed. That night at Amerigo, what blew me away was the absolute simplicity of preparation. The chard had simply been wilted and passed through some hot olive oil. Perhaps there was a splash of vinegar? It was the sort of minimalistic, exposed approach which is the genius of true Italian cooking.
The chard at Amerigo. It might not look like much, but its flavor was spellbinding.
As a chef, I’ve been haunted by that chard for six months, trying to recreate its spellbinding flavor, an intoxicating combination of freshness and depth. Am I exaggerating or misremembering? Perhaps. I too, after all, was a bit tipsy. But I don’t think so. That chard was every bit the equal to the exquisite meats and pastas we enjoyed that night.
Sauteed Swiss Chard with Garlic and Lemon Juice
Begin by assessing your chard. If the stalks and leaves are small, perhaps the leaves and stems can be left whole, offering an elegant preparation. If, as is more common, the stalks are big and thick, they can be detached from the leaves and cooked separately and a little longer.
Bring a small pan of water to a boil and drop in the chard. You only need enough water to steam the chard for a few minutes. If the stalks are thick, separate them, chop them into smaller pieces, and cook them for a few minutes before adding the leaves.
Once everything is wilted, remove the chard from the water and let drain a bit.
Meanwhile, saute a little garlic in olive oil, and once the garlic has become a little colored and aromatic, remove from heat. Add the chard (which can still be a bit wet as long as you let the pan with the oil cool somewhat) along with salt and possibly some hot pepper.
Return to the heat and saute for just a minute or so, adding a tiny squeeze of lemon just at the end. Not really enough to perceive strongly, but just enough to give some bright acidity to the dish. Maybe 2 or 3 teaspoons for 8 ounces of chard.
For a creamier dish, I sometimes add a bit of butter at the end as well. And always generous grindings of black pepper.
Our vegetable subscription season has started up again, and today we have another installment in a series on “difficult” vegetables, ones which are hard to cook or which people just don’t know about.
In this case, escarole couldn’t be easier to cook, but it’s a vegetable which not many Americans know of, and when they hear it’s in the class of Italian greens which have marked bitterness, they’re not inclined to try.
But they don’t know what they’re missing. As Italians know, mildly bitter greens marry beautifully with strong flavors like hot pepper, pork fat, and anchovies. Of course, there’s bitter and then there’s BITTER. The former can be pleasant if in balance with other flavors. The latter is a flaw.
In order to tame the bitterness in our escarole, we grow it only during cool weather, finishing the harvest by June and not beginning again until October. We grow it only in greenhouses, protected from the elements, which results in a more tender result. Escarole harvested in the middle of July is going to be hard for anyone to eat. But in the right season and with the right architecture of flavors, mild bitter Italian greens like escarole (along with endive, radicchio, broccoli-raab, dandelion, and others) deserve a place on our tables.
Sautéed Escarole
Begin by rinsing the escarole well. It’s possible to get soil hidden deep in center, so a little extra cleaning time is worthwhile.
With a small head, simply cutting it in half or quarters works well. For a bigger head, individual leaves can be pulled off.
Some people swear that soaking the leaves for a half hour or more in cold water reduces bitterness, but for me it’s enough to blanch them in boiling water for a minute or two, until just wilted and mostly tender. Some people think that plunging them back in cold water afterward helps with bitterness as well. I usually don’t bother.
Heat a pan with a generous bit of olive oil and some chopped or sliced garlic. Over medium heat, cook until the garlic just begins to take on some color and then remove from heat. Be careful because the garlic will continue to cook once off heat.
Add the escarole to the pan once it cools down a bit, so you don’t get splattering (the escarole will be a little wet). Season the escarole with salt and hot pepper. If you’re brave add a high quality anchovy or two and stir to dissolve it. If you do, you’ll produce a dish which tastes very much of Rome, specifically the Jewish culinary tradition of that city.
In any case, cook for a minute or two over vigorous heat, allowing the flavors to come together and serve at once.
In the early days of her teaching career, the late Marcella Hazan used to startle people by pointing out that spaghetti and meatballs is not an Italian dish. If you see it on a menu in Italy today, it’s an indication that the restaurant is a tourist trap and that one should dine somewhere else.
The problem with the dish is that a plate of pasta should become one with its sauce, full integrated without a separation of pasta on the bottom and sauce on top. Meatballs and spaghetti can never become one. It’s a dish which is clunky and inelegant, violating one of the principal standards of good Italian cooking: balance.
And yet, meatballs themselves, served not with pasta but as a stand-alone appetizer or meat course is very Italian, and nearly every Italian region makes meatballs of some kind or another. Honestly, meatballs are one of my very favorite foods in all the world. Sadly, the quality of most meatballs out there is quite poor, even in Italy. I can’t count the number of times I’ve ordered them, even in a good restaurant in Italy, only to be disappointed. It’s made me obsessed with understanding what makes a good meatball, and where so many people go wrong.
The rarity of a good meatball has always puzzled me because making good ones is not especially hard. I did it right from the start, following Marcella Hazan’s classic recipe in her The Essentials of Classic Italian Cooking. Honestly, I’m not sure where so many people go wrong and why so many meatballs end up tasting heavy and dense, or worse yet, spongy and plastic.
For me, a meatball should be rich but delicate, hearty but soft, and meaty but fresh. To accomplish this, I think there are a few key things.
The first is to use meat which is not too lean. Fat provides flavor and juiciness, and so using lean ground meat can never provide the sort of meatball I’m looking for. If shopping at the store, I always buy 80/20 ground beef, the richer the better. Of course, shopping at the store is problematic because most meat there comes from industrial, confinement operations which are too nauseating to contemplate. Buying from a local farm makes me feel much better, except that local, grass-fed beef is often too lean and sometimes too gamey in flavor. It can be a problem. Sometimes I accept the leanness, but usually I enrich the lean meat with ground pork fat (which I realize not everyone has), and sometimes I even shop at the store, despite my scruples. But there’s no doubt that the richer the meat, the better the meatball will be. Different types of meat will affect the meatball too – pork instead of beef for example – but most types of meat can produce a good meatball. Don’t believe anyone with over-specific instructions, explaining that it HAS to be an exact mix of beef, pork, and veal. One of the best meatballs I ever made was a mix of ground duck legs and beef.
A second essential principle is to use high-quality bread rather than Wonder bread or ground bread crumbs, as so many recipes recommend. High-quality bread, soaked in milk to soften, provides the essential counterpoint to the meat in a meatball. Dan Richer – who operates Razza, one of the best pizzerias in the US and one of the only places in the US to make meatballs which blow me away – spoke elegantly about the importance of the bread in an interview we did in 2018:
“I think people typically don’t use enough bread. We use really big chunks of our bread, and it’s light and airy so it produces this negative space in your mouth, like in a black and white photo. The bread is that negative space. When your teeth bite through it, your perceive that airiness – that negative space – in your mouth.”
Dan is the first person I’ve ever heard talk about the importance of bread in a meatball in this way, and he’s dead-on right. The bread needs to be good, light, abundant, and not too fine.
A third, and related principle, is that the meatball “dough” should be gently mixed and individual ingredients should retain their identity. The “dough” shouldn’t be mixed to a homogenous, heavy mass with no air. When the meatballs are shaped, it should be done gently, enough to keep the meatballs from falling apart but not so much that all the air is pressed out. Shaping a meatball with too much pressure can ruin the whole thing.
Finally, and this is a bit controversial, I think the best meatball is one which has been coated with bread crumbs and deep fried, and then braised with a sauce of tomatoes, cabbage, peppers, or whatever. Frying the meatballs creates a crisp surface which serves as a great counterpoint to the soft and tender interior. I have to admit, however, that Dan Richer has no fryer at Razza, and his meatballs go straight into his wood-fired pizza oven with no coating of any kind. They come out perfectly. But then again, the oven is heated to a wickedly high temperature that home ovens can’t produce. To me, baking a meatball in a home oven is always a disappointment.
Dan’s amazing meatballs at Razza
Of course, there is no such thing as a definitive recipe for anything. This is my current approach, constantly being evaluated for improvements. There should be no dogmatism in cooking, and you should make your cooking your own.
Braised Meatballs
Begin by soaking about 100 grams of high-quality bread in a bowl with enough milk or buttermilk to almost cover. I often cut off some of the crust if it’s firm, but I like to leave some for texture.
While the bread is soaking, add 450 g (1 pound) ground meat to a bowl, and add an egg, some chopped parsley, two or three tablespoons of finely chopped onion, about ¼ cup parmigiano, a tablespoon or two olive oil, and a small grating of nutmeg. Add the soaked bread (squeezing out most of the milk) along with salt and pepper. The right amount of salt will be a teaspoon to a teaspoon and a half, depending on the salt.
Mix everything together gently, until just combined. You want to see chunks of this and that, not too homogeneous.
Coat in bread crumbs (no need to dip in egg first, the meatballs should be tacky enough) and fry until both sides are browned. For me, the best way is to deep fry them at 365 degrees in a pot with enough oil that the meatballs can float. If that kind of cooking is a turn-off for you, brown one side in a pan with a generous coating of olive oil, and then turn and do the other. They won’t be as good, but life is often a compromise!
Once browned, transfer them to a pan with some high-quality canned tomatoes, crushed by hand and well-seasoned with salt. No need for extra oil. The oil clinging to the meatballs will be enough.
Add a little water to the pan, bring to a simmer and then transfer to a hot oven (400 to 450 degrees), cooking for about 15 to 20 minutes until the meatballs are cooked through.
For an extra elegant touch, pass some high-quality canned tomatoes through a food mill, season well with salt and olive oil, and bring to a gentle simmer. Place this rather pure tomato sauce under the meatballs for an elegant presentation.
Serve at once, with a little garnish of parsley and parmigiano.
I’m embarrassed to admit that I hadn’t cooked a red cabbage in more than 10 years, until last week. There’s no good reason. When I first starting cooking about 20 years ago, everything was so new that I’d try anything. I’d just go page by page in Marcella Hazan’sThe Essentials of Classic Italian Cooking, and almost everything was as wonderful a revelation as what I’d cooked the day before. I was especially fond of Marcella’s recipe for braised chicken with red cabbage.
But over time one develops preferences. It’s not that I disliked red cabbage, but that I was drawn to other things more. To me, one of the least attractive aspects of getting older is the loss of the joy, typical of one’s youth, that comes from the lovely newness of everything. As one ages, what was once fringed with delight can become rather ordinary from repeated exposure. I suppose red cabbage was a little like that for me.
I’ve always grown it for our CSA, and though it is not the most popular item we grow, a few customers really love it. Last week I decided that enough was enough, and that it was time to reintroduce myself to red cabbage. This post is the third in a series on “difficult” vegetables, those that are easy to cook but unfamiliar to many. If one has never tried red cabbage or been turned off by overcooked, mushy and strong-tasting ones, I think the approach I offer here will be a welcome revelation. May it provoke the surprised delight that I so often experienced in my early days of cooking!
Braised red cabbage with bacon and onions
Although it could be made with a non-smoked meat like pancetta or sausage (or even made vegetarian without any meat at all), I like this dish best when it has something smoky in it, so ham would be fine, or speck (the smoked prosciutto from Northeastern Italy). Most readily available to Americans would be bacon, which is what I used last week when I had fresh bacon just off the smoker. When you smoke your own bacon, you always have end bits and scraps left over from the slicing, and those are perfect for using here because they tend to be extra savory. If all you have is traditional sliced bacon, that’s just fine to use as well.
Begin by slicing or dicing up about 2 ounces of bacon and 2 to 4 ounces ounces onion. I like to leave the onion in larger chunks, but thin slices are okay too. Saute with olive oil over a lively flame until the bacon is lightly browned and the onion is wilting and taking on some color.
Add about 8 ounces of sliced red cabbage. I don’t bother to remove the white inner core and see no need to. Season with salt and pepper and toss everything very well. If you sense more lubrication is needed, don’t be bashful in adding extra olive oil. It depends how much fat the bacon renders.
Lower the heat to a gentle simmer and cover. Let the cabbage cook gently for about 20 minutes, either on the stovetop or transferred to the oven. As long as it’s covered, the moisture trapped should be enough to cook the cabbage and keep everything from burning, but you might need to add a bit of water if things are drying out to much.
When the cabbage is tender (about 20 minutes or so), return it to a lively flame and taste for seasoning. Add some freshly chopped parsley, toss, and serve at once.
This is the second in a series of posts on cooking “difficult” vegetables. In addition to operating our small restaurant, we grow vegetables for a small number of subscribers, and so we’re frequently thinking about ways to help people cook the vegetables we grow for them.
For many people, radishes and turnips are a hard sell. Most people only know the aggressive, spicy flavor of radishes uncooked in salads. And most people don’t know where to start with a turnip.
But one elegant and delicious solution for both of these vegetables is to cook them together in a little butter until nicely browned and very tender. Most people have never thought of cooking radishes, but it’s a great idea because cooking mellows their flavor, just as cooking fennel does.
And in a world where undercooked crunchy vegetables dominate, radishes and turnips also offer a wonderful example of a fully cooked, creamy vegetable, where the texture offers a loveliness even more important than flavor, as is also the case with eggplant.
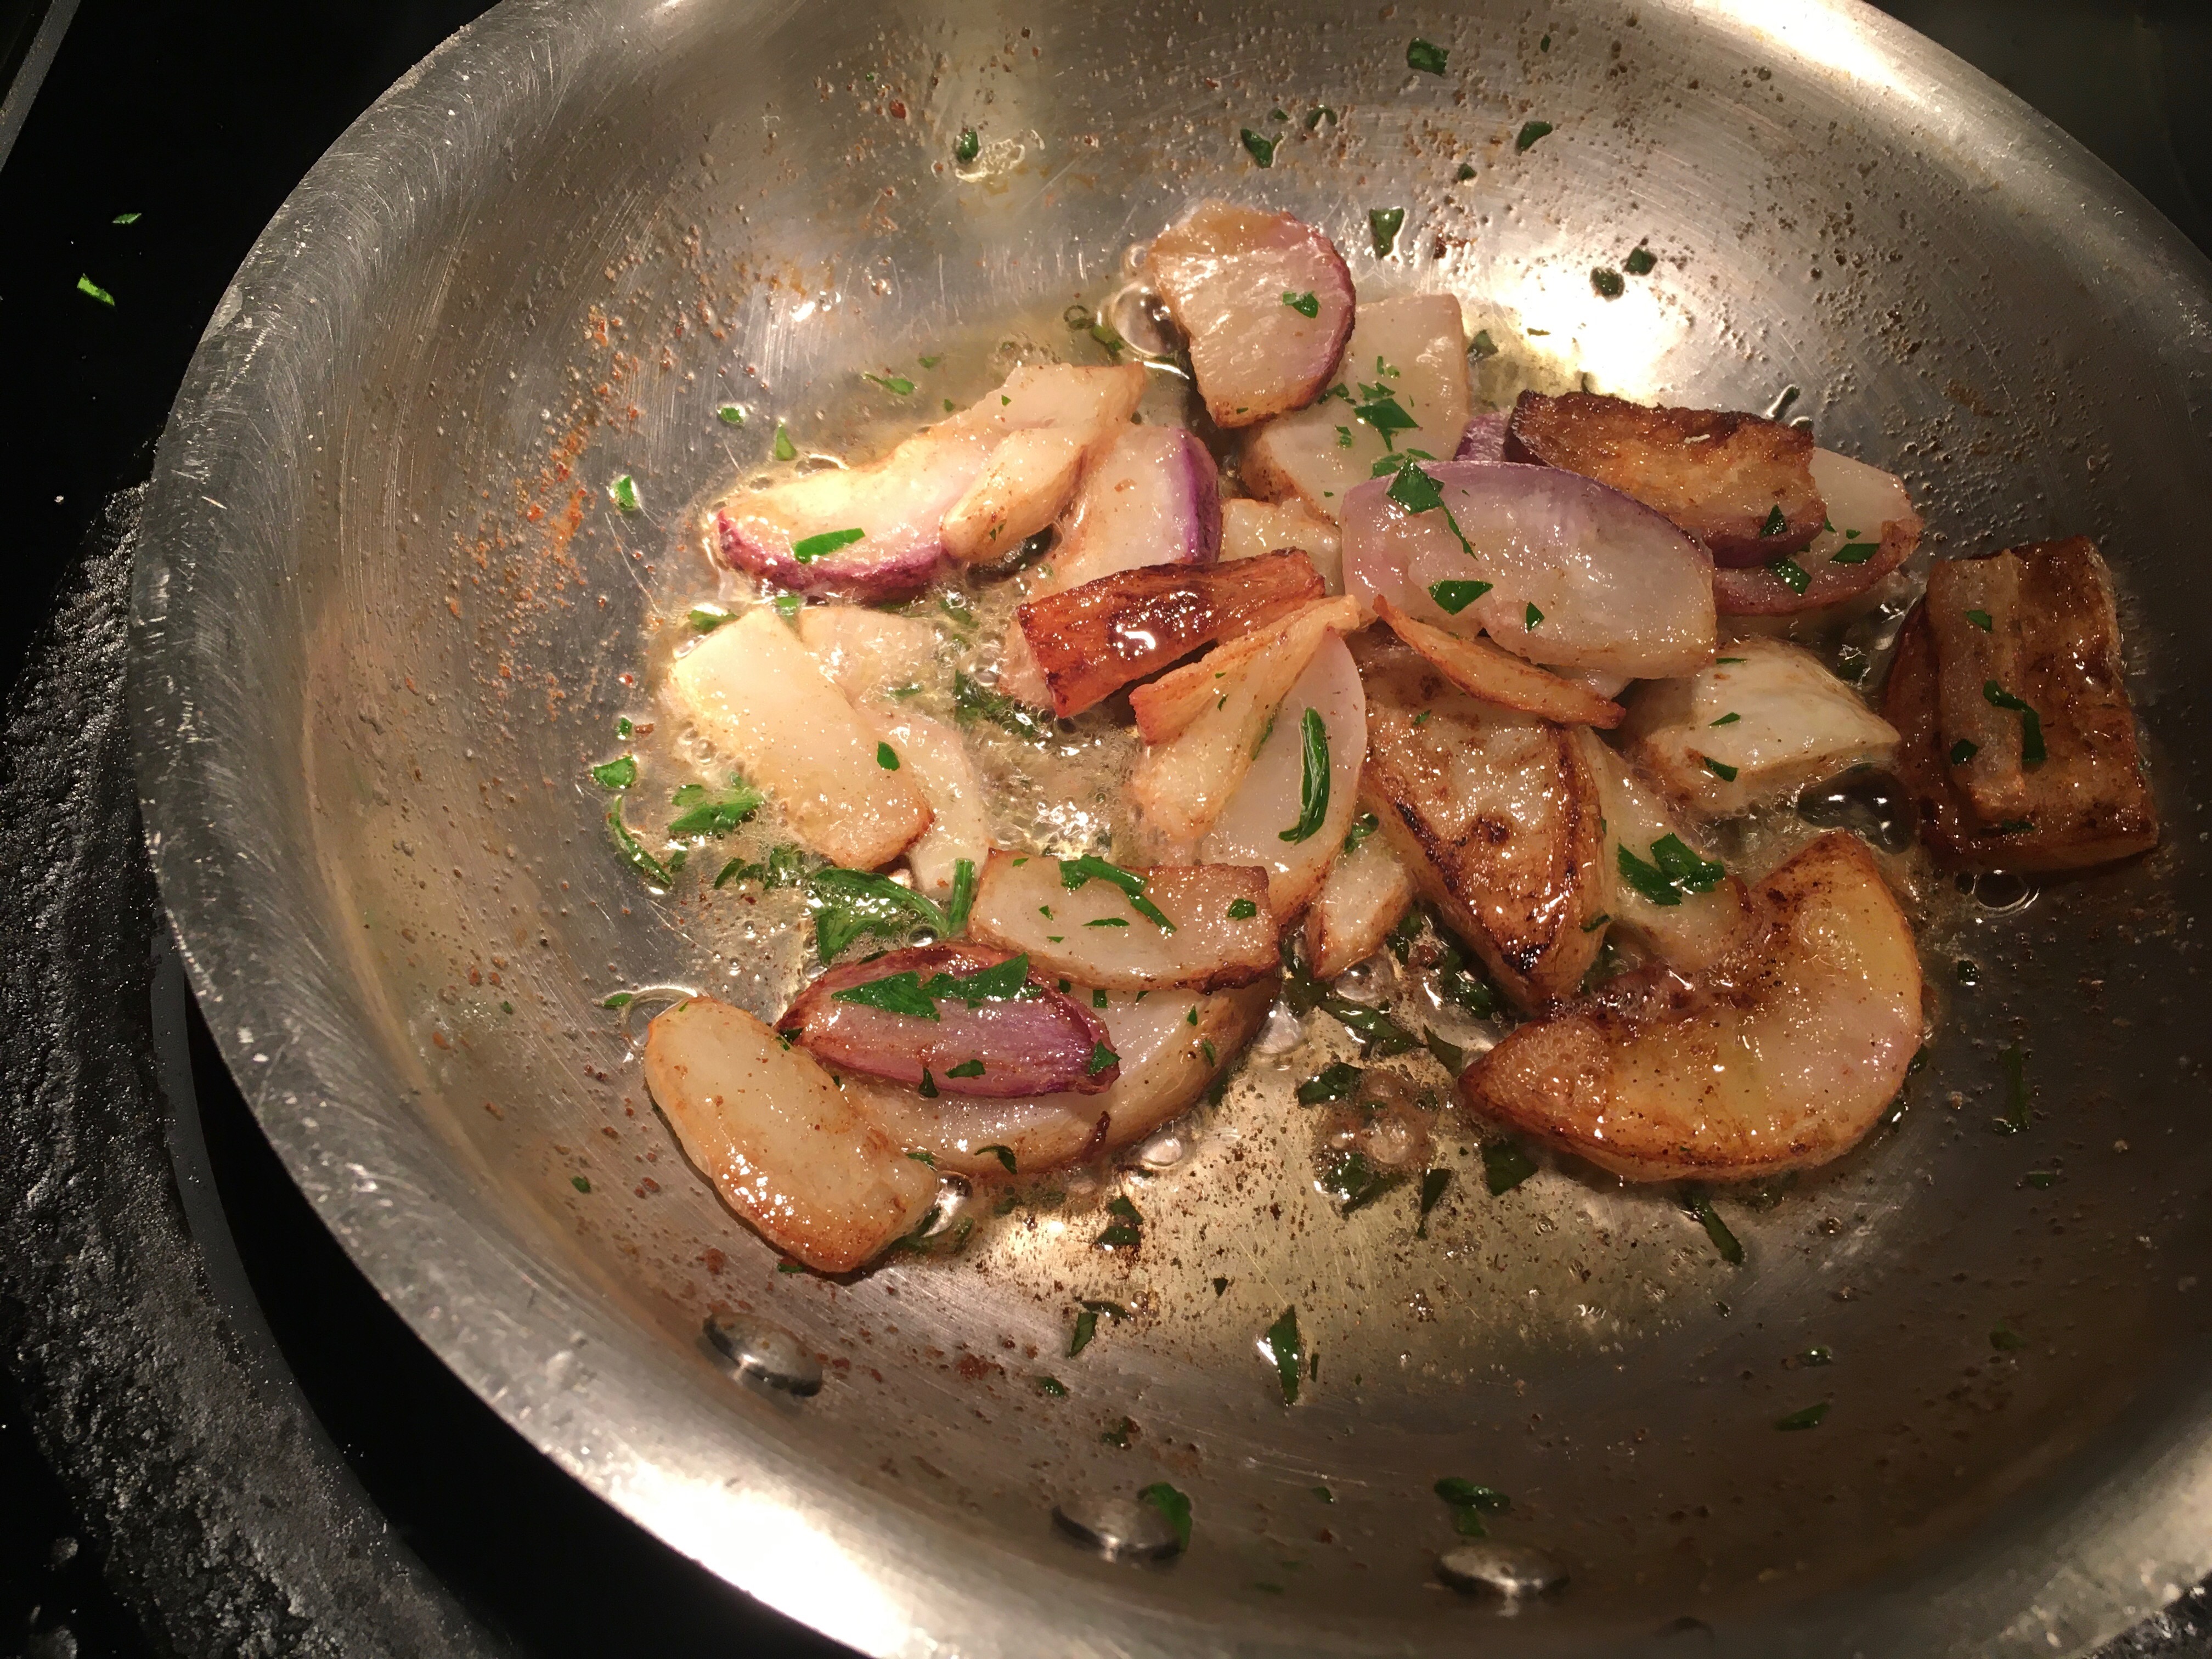
Other root vegetables, such as carrots and/or potatoes, could be added to the mix, but in the photos below we have only radishes and turnips. In particular, we have the small, white, Japanese Hakurei turnip, though standard turnips, if not too large, should work just fine.
Notice that the vegetables are cut into irregular pieces. Some of half-moons, others matchsticks, still others are little chunks. This kind of variety isn’t necessary, but it is interesting. It’s the sort of inconsistency which one might be taught is wrong is certain cooking schools. But don’t listen to them. There are things that matter in cooking and things which don’t. Uniform size rarely matters much.
Sautéed Radishes and Turnips
Begin by chopping the vegetables into any shape or size you find interesting. If small, they could simply be sliced in half. There’s no need to peel them.
Melt a generous bit of butter in a pan which can accommodate the vegetables snugly but without overlap. When the butter’s foam begins to subside, add the vegetables and season with salt and pepper. Depending on the type of salt, the the ratio should be ½ to 1 teaspoon per pound of vegetables.
Keep the heat strong, though be careful not to burn everything. After 2 or 3 minutes, cover the pan and either reduce the heat to low or place the covered pan in the oven. Leave undisturbed for 10 or 15 minutes.
Take off the cover and raise the heat, making sure the vegetables are browned and beautiful. Notice the amount of butter in the pan below. Most Americans habitually cook with less fat than is necessary. But just because the fat is in the pan doesn’t mean it needs to all be on your plate, which is an important principle to keep in mind.
When the vegetables are browned and fully tender, toss with a little freshly chopped parsley and plate with a little grating of parmigiano.
For many people, cooking radishes and turnips like this is a revelation. It was for me. Even tonight, cooking them after dinner (when I wasn’t really hungry) merely for the sake of taking photographs for this post, I enjoyed them thoroughly. They were delicious. Their creamy texture and mellow flavor will convert the most inveterate radish skeptic.


 I’m embarrassed to admit that I hadn’t cooked a red cabbage in more than 10 years, until last week. There’s no good reason. When I first starting cooking about 20 years ago, everything was so new that I’d try anything. I’d just go page by page in